Precision Control Equipment
H-R Industries has been able to reduce operating costs using new testing and inspection methods...
Reducing operating costs is the key to success at HR Industries, Richardson, Texas. Keeping the cost of manufacturing low, while maintaining process integrity through advanced testing and inspection methods, has helped the company build on its reputation as a high-quality circuit board manufacturer.
HR Industries manufactures printed circuit boards and press fit backplanes for leading electronics manufacturers such as Lucent Technologies, Eastman Kodak, Dell Computer and HewlettPackard. In 1996, to compete more effectively with offshore manufacturers, HR Industries opened a highvolume printed circuit (PC) board manufacturing facility in Bonham, Texas. The facility was designed to minimize cycle time by using hightech equipment and processes.
Featured Content
"Our goal was to reserve the Richardson facility for small-volume production and backplanes and dedicate the new Bonham facility to high-volume production," said Gary Roper, the company's vice president of quality and process. The Bonham facility is set up in a linear configuration with automated manufacturing and material handling equipment.
To keep cycle time as short as possible, the Bonham facility produces PC boards using the panel plating process in a horizontal plating line. Because panel plating does not require the lengthy queuing time that pattern plating does, production time has been reduced to about 80 minutes, rather than two days.
Test equipment saves additional costs. Part of the new plating line installation was a Fischerscope® MMS universal coating and material property measurement system manufactured by Fischer Technology, Windsor, Connecticut. This modular, benchtop measuring system allows the user to perform non-destructive measurement of copper plating thicknesses on PC boards using the electromagnetic, eddy current or beta backscatter method. The measurement method is changed simply by changing the probe, and the operating mode is changed by the push of a button.
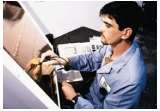
According to Mr. Roper, "This system allows us to pull a panel at the inspection station and check five locations on it to determine the plating thickness." The plating thickness of the first and last board in each lot is measured in the center and at the four corners. Data from the measurement is used by the plating operators to adjust the process to ensure consistent plating thickness.
Prior to using this system, the company punched a coupon out of the middle of every panel to inspect plating thickness. It was a costly process.
"We estimate that the microsec-tioning approach was costing us about $96,000 a year in destroyed product," Mr. Roper said. "Using the new measurement system eliminated that cost." The couponing process also took time, about 10 minutes per board. This is compared to the one minute maximum necessary to inspect five locations on the board with the new system.
The information from the plating thickness measurement is used to correct the plating process if operators see thicknesses moving out of control limits. "We're getting complete data faster, and that is letting us correct process aberrations sooner," said Mr. Roper.
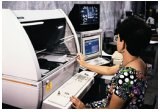
The measurement system includes easytouse software. The system's large, flatscreen LCD display allows the operator to discern important information immediately. In the installation at HR Industries, the operator is presented with a real-time control chart by making a simple presentation mode selection. Process capability indices such as Cp and Cpk are calculated continuously.
Precision measurement capability is essential in the plating operation. The horizontal panel plating line at Bonham produces an even plate on the circuit boards, with variations in the range of 0.2 mil. "We have a Cpk of between two and 2.5, with upper and lower control limits of 0.95 and 1.12," Mr. Roper said.
X-ray fluorescence to measure solder thickness. HR Industries also operates the Fischerscope® XUVM X-ray system at the Bonham facility to check the solder thickness on circuit boards with surfacemount devices and to verify gold and nickel thickness.
"Part of our first part inspection is to check five locations on each side of the surface mount pads, the four corners and the center to verify that the solder thickness is uniform," Mr. Roper said. "The measurement data is used to construct statistical process control charts."
The X-ray fluorescence (XRF) system is a benchtop coating thickness measurement unit that provides contact-free measurement on a variety of single and multiple coatings, simultaneous measurement of alloy and composition and statistical process control analysis. Using the XRF method, the system measures from under the part to a precision of better than one pct. This design, rather than the more traditional positioning of the X-ray beam above the measuring table, allows the inspector to have full view of the parts checked during the process.
The system features a large 600-by-470-by-400-mm measurement chamber to accommodate large sample batches. A precision, manual xy table allows the positioning and measurement of multiple samples without opening the hood between measurements.
Advanced inspection software. The XRF system is equipped with Fischer Thickness Management (FTM) software. This software is based on a special approach to processing the XRF signal called the Fundamental Parameter (FP) method. The FP method is a computer simulation of the entire XRF process, from excitation of the fluorescent radiation through primary radiation to the proportional counter detector tube characteristics. In XRF analysis, the FP method produces an evaluation system based on mathematical formulation of the elementary physical processes, rather than generating an empirical model using calibration standards.
The software uses the results of three FP calculations, primary X-ray spectrum distribution, absorption coefficients and fluorescent yield, to determine the coating thickness, alloy composition and ion concentration in plating solutions. It makes possible the measurement and analysis of triple coatings and alloy coatings with two or three alloy components.
HR Industries had prior experience with XRF equipment. The company operated a Fischer X-ray 1010 in the Richardson facility for about five years before installing the XRF system in Bonham.
"What we like about the X-ray units is that they are fast enough that we can get realtime SPC information from the measurement, and they are easy enough to use that we can teach all our operators to use them," Mr. Roper said.
Operators use the information to adjust process parameters, such as conveyor speed or the angle on the air knives. After adjustments have been made, the operators perform another firstpart inspection and continue to check the thicknesses until the process is producing plating thicknesses within tolerance specifications.
"We are not only using the XRF system for solder thickness measurements, we are also using it to verify the tin/lead composition of the solder," Mr. Roper said. "It gives us a second opportunity to make sure our composition is good."
The combination of advanced manufacturing operation and precision measuring devices has helped give HR Industries a competitive advantage in the electronics manufacturing industry. "The new facility gives us the ability to produce twice as many PC boards with about half as many people," Mr. Roper said.
RELATED CONTENT
-
Smut and Desmutting
Question: I am new to this industry and have heard about smut and desmutting operations.
-
Nickel Electroplating
Applications, plating solutions, brighteners, good operating practices and troubleshooting.
-
Plating Q&A: Can you color stainless steel?
Our expert, Art Kushner, says yes, you can color stainless steel, but it is not a process that is typically performed in a plating shop. Read more about his answer.

