Properly Following Cleaning Protocols
Should suppliers use your technical cleanliness inspection procedure? Here’s a look at how three industry-standard requirements play together with customer-specific standards.
ISO 16232 and VDA 19.1, familiar industry standards for technical cleanliness, are generic by design and lay out the framework for developing cleanliness specifications for particulate contamination of components and systems. But how many manufacturers unwittingly violate their requirements?
Since the first editions of VDA 19 and ISO 16232 were published in 2004 and 2007, respectively, most customer-specific standards adhere to or are modeled after them. Developed primarily by OEMs and Tier-One suppliers, customer-specific specifications are written to control the cleanliness of a system (for example, transmission) and are cascaded down to lower-tier suppliers. Limits may be defined for mass, particle size or particle-size distribution, and in many cases, the inspection procedure is prescribed.
Featured Content
This approach makes sense on the surface: Define the requirements and communicate them. However, many customer-specific standards go too far by prescribing inspection procedures that are component-specific or one-size-fits-all instead of allowing an effective procedure to be established. The industry standards for technical cleanliness are generic by design. Not all components of a system can be inspected in the same manner. When manufacturers fill in the details that industry standards leave unspecified, suppliers may be forced to violate key requirements, leading to erroneous results during inspection.
With that in mind, I pose this question: Should suppliers use your technical cleanliness inspection procedure?
To help answer that question, let’s consider three of the 300 requirements established by ISO 16232 and VDA 19 that are covered in this article and examine whether customer-specific standards comply with them. They ensure an effective extraction procedure, an adequate number of components and a compatible test liquid.
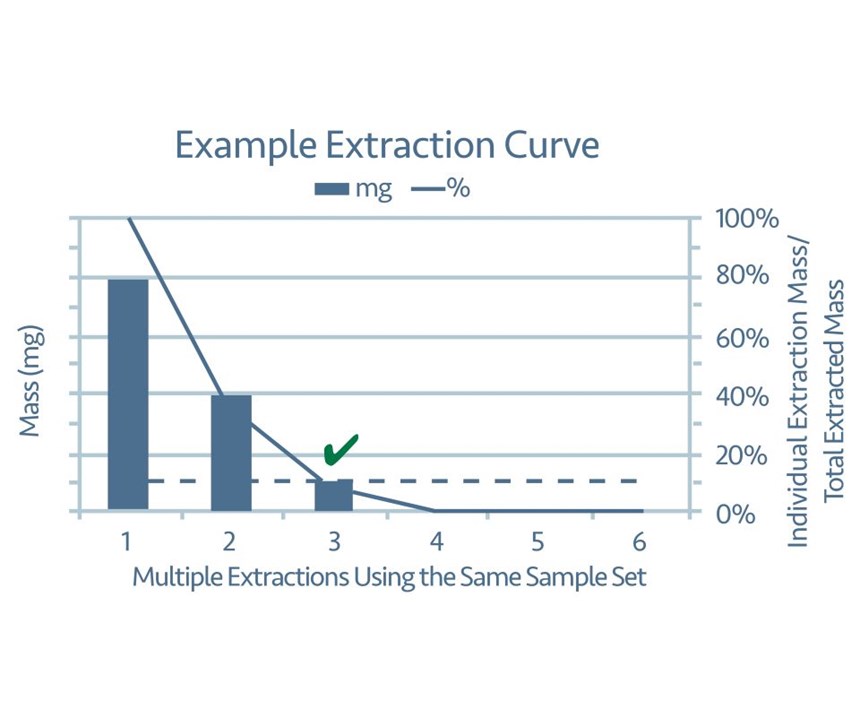
1. The effectiveness of the extraction procedure must be verified. Verifying effectiveness ensures that the extraction procedure is removing at least 90 percent of the contamination from the tested components. The verification process is almost identical in both industry standards. One set of test components is subjected to a process intended to extract particulate contamination. The extracted contamination then must be measured and documented. This process is repeated on the same set of test components for as many as six total iterations. The measurement taken at each iteration is then divided by the sum of the measurements leading to that step (see Figure 1). Verification is complete when the measurement for a given iteration is less than 10 percent of the sum. Then the inspection procedure can be documented as the sum of the extraction processes required to verify effectiveness.
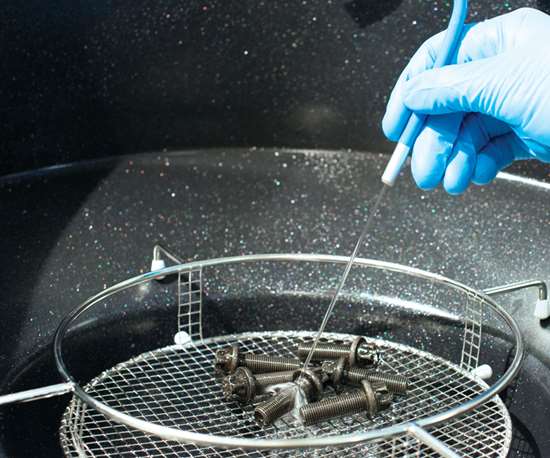
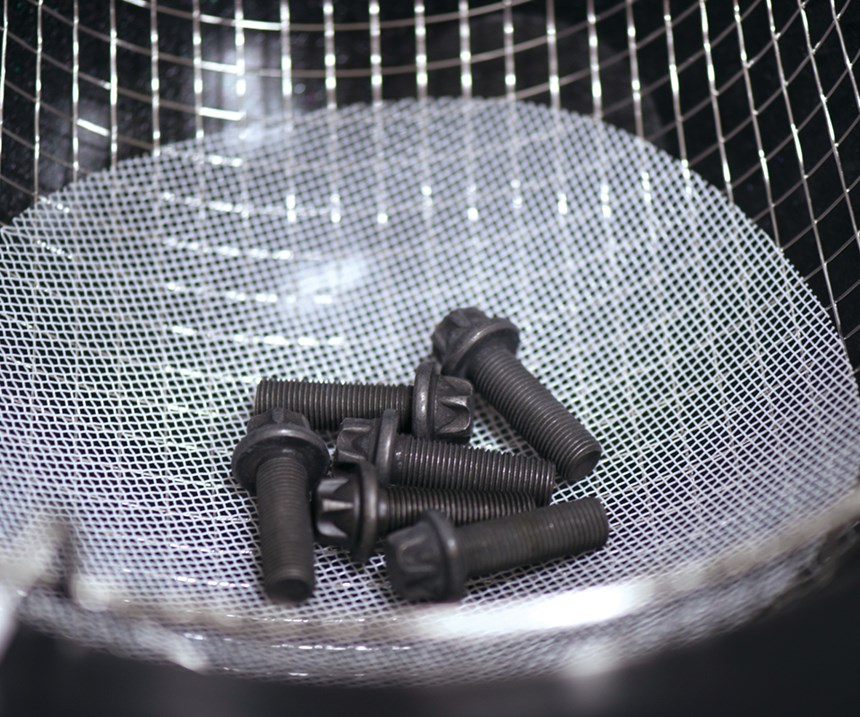
For example, a set of fasteners is subjected to an ultrasonic extraction process for one minute. The mass of the particulate contamination extracted during this first iteration is found to be 24 mg. The same set of fasteners is subjected to five additional ultrasonic extractions that are one minute each. The mass of particulate contamination for each iteration is found to be 12 mg, 3 mg, 0 mg, 0 mg and 0 mg, respectively. The equation taken from the ISO standard calculates that effectiveness is verified at the third iteration of the extraction process:

This means that the sample size of this fastener must be subjected to the ultrasonic extraction process for a total of three minutes to ensure that at least 90 percent of the particulate contamination has been extracted for inspection.
This approach can be compared with a few examples taken from customer-specific standards.
One such standard requires the test components to be subjected to ultrasonic extraction for 10 minutes. How likely is it that this one-size-fits-all procedure will be effective for all components, regardless of size, shape, manufacturing method and so on? For instance, it is known that ultrasonic cavitation can erode cast components, thereby generating particulate contamination instead of simply extracting it.
Another customer-specific standard takes a slightly different approach by requiring ultrasonic extraction for one minute except for coated, powdered metal or sintered components that are to be spray-rinsed. While this component-specific approach allows for two different extraction methods, it still doesn’t account for size or shape.
So why does this matter? A shop that’s responsible for these cleaning processes might think these different approaches are simply different ways of accomplishing the same task, but they are not. The requirement in the industry standards yields an extraction procedure that is verifiable. It can be proven that at least 90 percent of the contamination is being removed. On the contrary, with a one-size-fits-all or component-specific approach, it’s difficult to know how much contamination is being removed. The risk is that the components actually may be dirtier than testing shows.
2. An adequate number of components must be analyzed. According to the industry standards, a certain number of components need to be analyzed to measure a significant number of contaminants that complies with the requirements for a “blank” value.
A blank value is received by conducting the cleanliness inspection without introducing the test components. The same procedure is followed (same amount of test liquid, duration of testing, filtration, environmental conditions and so on) in order to determine what effect the inspection environment and equipment have on the inspection results.
For gravimetric analysis, the acceptable blank value for both ISO 16232 and VDA 19 is less than 10 percent of the presumed or specified cleanliness level. According to the ISO standard, “using a four-digit balance under uncontrolled environmental conditions (uncontrolled humidity and temperature), the minimum measurable blank value is 0.3 mg.” Under these conditions, the number of components to be analyzed must be chosen so that at least 3 mg is collected during testing.
In other words, the number of components to be analyzed is directly affected by the environmental conditions of the cleanliness inspection and the cleanliness of the components. In contrast, some customer-specific standards simply prescribe the number of components.
One example requires analysis of one to 20 components (preferably five) depending on size, regardless of the type of component. The example given may work well for components with a large extraction surface area, however, for small components, 20 pieces may not be enough to ensure compliance with blank requirements.
Some companies have chosen instead to require analysis of a quantity that’s unique to each type of component, such as 200 screws, 10 gerotor sets and 10 covers. Although this might seem like a better approach, consider how widely surface area varies, even for similar components. Can we presume that a small and large screw have similar levels of cleanliness?
Also consider the ramifications of analyzing too many or too few parts. Too many parts may increase the time, difficulty and cost of analysis. More test liquid may be used, more particles may be collected resulting in the use of more filters or cascade filtration, and there will be higher potential for inspector fatigue. On the other hand, requiring inspection of too few parts can yield results that aren’t representative of actual conditions. It also may make it difficult or impossible to achieve blank values or verify the effectiveness of the extraction procedure.
3. Test liquid must be compatible with the component. This includes, but is not limited to, any coating, plating, rubber or seals that make up the component. Therefore, the test liquid must be carefully chosen to ensure it is effectively removing particulate contamination without deteriorating any aspect of the component being analyzed.
Some customer-specific standards mandate the test liquid that is to be used for all components, such as a cold degreasing agent with a flaming point higher than 55°C. How likely is it that only one test liquid will be compatible with all the components to which this standard applies? What about only one type of component? Fasteners, for example, are specified with a variety of different finishes, including electroplating, conversion coatings and organic/inorganic coatings. Will one test liquid be compatible with the range of these finishes?
Other customer-specific standards require that the test liquid be approved for use. While this requirement may be compatible with that of the industry standard, it begs the question, how is the test liquid evaluated? Is there a process for approving test liquids, or is there approval without any special consideration?
Choosing a compatible test liquid is essential to acquiring accurate data from cleanliness inspections. Inspections performed using an incompatible test liquid may deteriorate the component, resulting in contamination levels that are erroneously high. This could lead to misappropriation of personnel time or other resources that could otherwise solve real contamination problems.
So, we come back to the question at hand. Should suppliers use a shop’s technical cleanliness inspection procedure? That question cannot be answered directly, however, this information hopefully spurs shops to review the requirements placed on their suppliers and to consider the impact of those requirements.
Ben Lang is supervisor of product development engineering at Acument Global Technologies. Contact him at bnlang@acument.com.
RELATED CONTENT
-
Are TGIC-Free Powder Coatings Right For You?
This alternative to TGIC-based polyester powder coatings offers similar performance and enhanced transfer efficiencies.
-
Conversion Coatings: Phosphate vs. Zirconium
Both phosphate-based and zirconium coatings have their advantages, but zirconium is fast becoming the pretreatment of choice.
-
Preparation for Electroplating
What you should know about cleaning and electrocleaning.


