5 Things to Know About XRF Calibration
The proactive approach of validating measurement performance and calibrating only as often as necessary improves quality, consistency and reduces costs.
#asktheexpert #measurement-testing
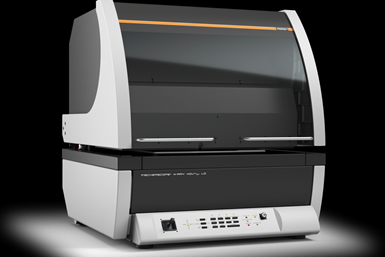
Q: How often should I calibrate my XRF?
A: From my perspective, pursuing measurement accuracy, traceability and consistency is the goal. Your calibration strategy and frequency should revolve around those objectives.
However, the short, unsatisfying answer is to calibrate as often as necessary. Your own quality control requirements, a customer’s purchase order, a regulatory requirement, or maybe an ASTM, MIL spec, or an ISO specification will guide you toward a program that best suits your needs.
Featured Content
I highly recommend users first calibrate their instruments to quality, traceable XRF standards**. Then, after calibration, periodically validate measurement performance using samples with known values. These validation measurements, collected over time using the same sample, can be used to evaluate an instrument for drift, measurement stability and long-term consistency. Calibration or adjustment can and should be made once a unit begins to show measurement performance outside your acceptable tolerance limits. (** Note: Some XRF models are capable of accurate “standards free” measurement performance. Applications measuring standards free should, at minimum, be validated to traceable XRF standards.)
Here are five factors that may affect long-term XRF measurement performance:
• X-ray detector type. Many XRF instruments use semiconductor-type detectors, while others may use proportional counter detectors. The semiconductor detectors are thermally controlled and tend to provide excellent long-term stability. Proportional counter detectors are not usually thermally controlled and may show some drift over time. Instruments using proportional counter detectors can provide long-term stability but may require more frequent calibration adjustments compared to XRF models using semiconductor detectors.
• Measurement sample. The periodic validation measurements should be done using samples having a consistent thickness (and alloy, if applicable). Subsequent measurements should be made at the same location. This ensures the data you’re tracking isn’t varying from a non-uniform sample or a different measurement location. Non-uniform samples can be used, but a measurement strategy of averaging multiple measurement points together should be established.
• Measurement time. Short measurement times can impact XRF measurement precision and lead users to believe the XRF instrument is unstable. The bottom line for measurement time is to make sure your validation measurements, and subsequent calibration measurements, use a sufficient measurement time to provide repeatable readings.
• Environment. Production, facility and process requirements may require XRF instruments to be located in areas with less-than-ideal environmental conditions. These units may drift more over time compared to units installed in clean, controlled environments. Instruments in sub-optimal locations should be more frequently monitored for measurement performance.
• Operators. Establish and control who is allowed to perform validation measurements. This helps ensure the performance data being observed has been consistently collected. Some XRF instruments include software functionality to automate repetitive steps using macros or “tasking.” Automating the measurement validation routine using a macro or task will help provide consistent performance data.
It is advisable to incorporate a reference/validation standard into your daily or weekly routine to monitor your XRF’s measurement performance. When you observe deviations beyond a specified tolerance, calibrating the application is recommended. The proactive approach of validating measurement performance and calibrating only as often as necessary improves quality, consistency and reduces costs. Timely recognition and rectification of any anomalies in measurement accuracy are pivotal. This enables you to customize your calibration timetable to align precisely with your distinctive operational requirements.
About the Author
Devarsh Shah
Devarsh Shah is a product and applications support engineer at Fischer Technology Inc.
Contact: fischer-technology.com.
RELATED CONTENT
-
Plating with Zinc-Nickel: Benefits and Challenges
Chad Murphy of Columbia Chemical speaks about the benefits of various types of zinc-nickel alloy, and provides tips for manufacturers about the zinc-nickel plating process.
-
Understanding Paint Atomization
BASF coatings development expert Tim December explains how paint atomization works for both pneumatic spray applicators and high-speed rotary bell applicators.
-
How to Avoid Orange Peel in Powder Coating
One of the most common quality issues with powder coating is an uneven “orange peel” texture. Bruce Hilbert, applications/technical manager for Tiger Drylac, offers advice for avoiding this common defect.


